

How To Make AirPrint Work with Any Printer
Apple originally promised it would support a wide range of wireless printers and virtually all shared printers. On release, it supports a very small handful of HP wireless printers and no shared printers at all – making it unusable for the vast majority of iPad users. The good news is that now there is an easy and free way to get AirPrint working as it was intended, and use it with your shared printers on your network.
How to Use AirPrint Hacktivator to Make AirPrint Work with Any Printer:
Some Notes on what the app does and how it does it:
irPrint Hacktivator is based on the Troughton-Smith hack. Version 1.0 to 1.6 essentially automated the addition a urftopdf mime types reference to two cups files and add a urftopdf filter for cups.
Starting with version 1.7 only the following two lines are added to the “/usr/share/cups/mime/apple.types” file:
# Added by AirPrintHacktivator
image/urf urf string(0,UNIRAST<00>)
No Apples files are redistributed nor installed by the latest version. A backup of the original file is done prior to adding the necessary line to allow for easily reverting the hack.
I had known about a few hacks that have been around for this purpose for a while, and shied away from them. The reason I am happy using this one is that it makes minimal changes, backs up the one file it alters (I’ve verified this while testing the app), and it is very easily reversible.
Steps to Use AirPrint Hacktivator:
– Download the latest version of the app (currently 1.7) here: http://netputing.com/airprinthacktivator/
– Unzip the application and launch it
– When the app launches, you’ll see just the simple Off / On toggle for it. Move it to On. You’ll be prompted to enter your password to approve the change – do that and click OK to confirm.
– You’ll then see a popup from the app that tells you what you need to do under System Preferences:
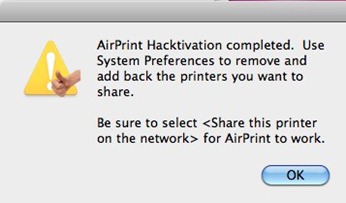
– Go to System Preferences > Print & Fax
– Click on the minus sign symbol to remove your printer from the list. Then add it back via the plus button. Once it is back in the printer list, tick the checkbox to share the printer on your network.
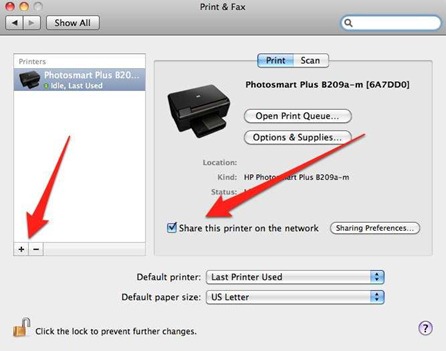
*Please note that you *must* remove the printer as stated in the step above. Do not think you’re already good to go if you see your printer listed and ticked as shared when you first open the Print & Fax preferences.
That’s it. Once you’ve done the above, you should find that you can use AirPrint on your iPad (or iPhone) in all supported apps, such as the built-in Mail, Safari, and Photos apps. To use AirPrint: